A Step-by-Step Tutorial to Setting Up your New WordPress Theme
If you’re new to WordPress or have never set up a new theme before, the thought of doing so can be daunting. This is especially true if you have an existing website or blog, as you have to ensure that your existing content fits with the new theme, and will translate into the new CSS template without a hitch.
I’ve created a step-by-step tutorial to setting up your new WordPress theme so you can install and customize your theme with confidence. Adding a new theme to your website is always exciting, as it signals a new chapter in your site’s development. This tutorial is designed to help you move forward with your new theme, and help your website reach its full potential.
Step 1: Find the theme you want to use
You can find a new theme in two different ways: through WordPress itself, or through a third-party premium or framework theme website.
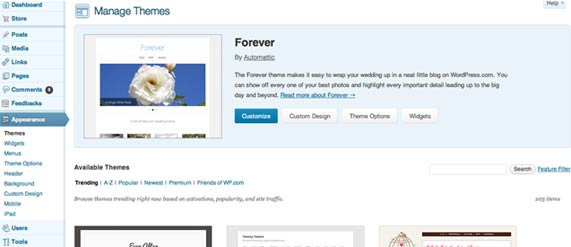
To find free and premium themes within WordPress, go to your website’s dashboard and click on “Appearance“. Under this tab, select the first option, “Themes” and you’ll see a page that displays your current installed theme.
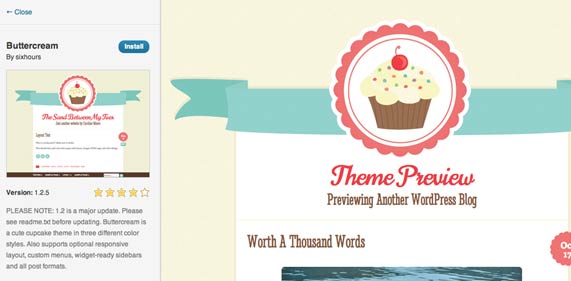
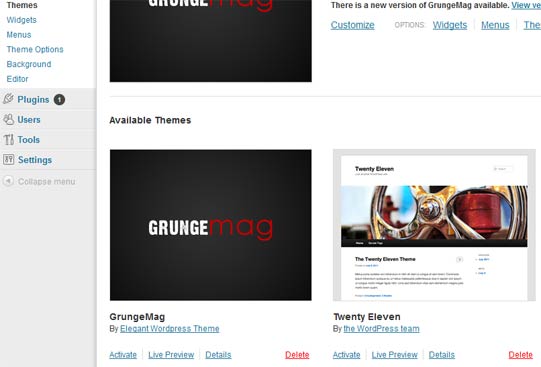
On this page you will see a list of “Available Themes”. These are themes you can install onto your website or blog. The type of theme you choose will depend on your website; you might need to search through several themes and shortlist your favorites before deciding. When searching, you can filter the themes alphabetically, by the most popular, by color and by release date.
Alternatively, you can use a third-party website to purchase a premium or framework theme. A premium theme is a ready-made theme that you can install out-of-the-box and use immediately. Premium themes cost anything from $15 upwards, but come with many more features and options than free themes. They also tend to look more professional.
-
Premium Themes
An example of a company that produce premium themes are Elegant Themes, a service I highly recommend. For a flat fee of $69, you have access to over 87 beautiful WordPress themes that you can use on a variety of websites. Yes, you can use all their 87 themes with a mere payment of $69 only! WooThemes and ThemeForest are also useful sites to find good premium themes.
-
Framework Themes
Framework themes are a special type of theme that allow you to design your website yourself, without having to know anything about coding, HTML or CSS. Framework themes like Headway use a drag and drop system, enabling you to design and preview certain elements of your website quickly and easily.
When you’ve found a theme you like, download it and save the zip file to your hard drive.
Step 2: Install your new WordPress theme
The method you use to install your new theme depends on which kind of theme you’re using. If you decide to use a theme from the WordPress website, simply find the theme you want, then click the “Install” button in the left-hand side bar. Then, return to your website’s WordPress dashboard, ready to activate the theme.
If you’re using a third-party theme, you can upload your new theme to WordPress in two ways:
- Using WordPress
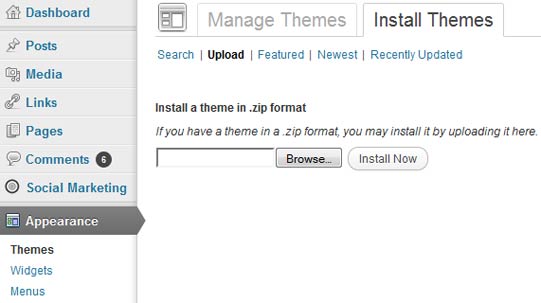
This is the simplest method. After you have downloaded the zip file containing your new theme onto your hard drive, go to your WordPress dashboard and click on “Appearance“. Click the “Install Themes” tab at the top of the page, select “Upload“, choose the file from your hard drive, and click “Install Now“.
- FTP Upload
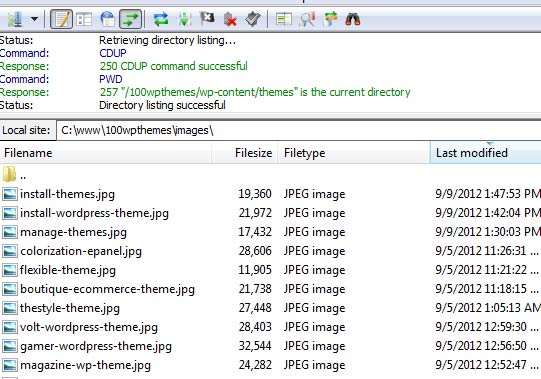
The second method is slightly more complicated and involves uploading the new theme to the WordPress directory on your hosting account. To do this, you need an FTP client like FileZilla. Find the WordPress directory files on your hosting account, then locate the directory “/wp-content/themes/”. Upload the theme to this directory. When the upload has been successful, you should be able to see the contents of the zipped theme file in the directory.
Step 3: Activate the theme
Once you’ve chosen and installed your new WordPress theme, you’ve navigated the hardest part of this process. The final step you need to take before your theme goes live is to activate it.
To activate your WordPress theme, return to your WordPress Dashboard, scroll down to “Appearance” and ensure you’re viewing the “Themes” page. Having installed your new theme, you should now see it in the “Available Themes” section. To activate the theme, simply find the thumbnail of the theme you want, and click the “Activate” link underneath. Your new theme will go live, and all you have to do then is customize it (if there is a need to do so).
Step 4: Customize the settings
The customization options you have will depend on the theme you’ve chosen. As I recommend Elegant Themes, I am going to demonstrate how you can use their particular customization options to create the website you want.
As you can see, the customization options you have include widgets, menus, and theme options that are specific to SimplePress.
- Customize
The “Customize” link gives you the chance to edit key features of your website, such as the site’s title and tagline, the background color and image, and whether your site has a static homepage, or displays your latest posts instead. You can also preview what your changes will look like on your website before saving them.
- Widgets
Widgets are snippets of code that add extra functionality to your website by inserting features in your site’s sidebar or footer. Available widgets you might use include a search box, a box displaying recent posts, and a section for adverts.
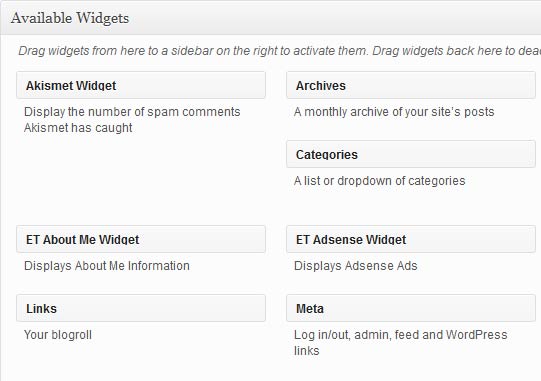
You can add new widgets to your sidebar using the drag-and-drop method. If you want to change the order the widgets are displayed in your sidebar, you can use the same method to do this too.
- Menus
The “Menus” feature allows you to use custom menus in place of your theme’s default menus. This enables you to change the order of pages that appear in the toolbar, and those that appear in any drop-down menus on your theme.
- Theme Options
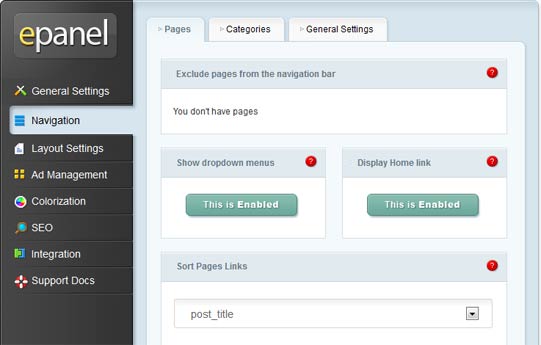
“Theme Options” gives you the opportunity to customize a range of options that are specific to your theme. If you install an Elegant Themes theme, clicking this link takes you to the ePanel, which is Elegant Themes’ version of a control panel. Here, you have access to a greater range of options that aren’t generally available through the WordPress dashboard.
Installing a new WordPress theme can give you a range of additional options that offer greater control over how your website looks, and the type of features you use. Once you’ve decided on a theme, and installed it on your WordPress website/blog, you can enjoy customizing it to suit your business, and create a website that makes you proud.
Hi, I am trying to use Elegant Themes and have zeroed in on either Chameleon or The Corporation. But contrary to most of the hype, as a newbie I have found ET to be very frustrating. Just to do something like background color must be done in two different places. The same with logo and the tag line under it. To change most elements or issues the answers in the support forum are 90% of the time: 1) paste this code in some CSS sheet or PHP file, 2) go to this third party site for the answer, 3) sorry, we don’t support that but thanks for the suggestion. The documentation is sad and pitiful, summarry level at best. Are there any step-by-step video tutorials you can recommend? And I do mean step by step. I do not know how to create code or change any CSS file, nor do I have the time. I need to know what each switch, toggle and field does and why? Or how can I begin to know whether to turn it on or what to input into it. Thanks for listening.
Frustrated in Seattle,
Tom